Installing Whitebox Tools
Why We Are Using The Older Version
For this course, we are reverting to the original Whitebox Tools setup instead of the newer Whitebox Workflows plugin. The Whitebox Workflows interface is currently too flawed and too unreliable for us to depend on at the end of the quarter, so we need the older Whitebox Tools version that still works well with the QGIS labs we use in class.
That means the setup in this guide is the one you should follow, even if you see newer Whitebox Workflows instructions online or inside other materials.
Why We Use Whitebox Tools
Whitebox Tools is one of the course tools we use for raster and terrain analysis because it is fast, reliable, and especially good for hydrology workflows such as flow direction, flow accumulation, and watershed delineation.
The newer Whitebox Workflows interface is available in some places, but for this course we are using the original Whitebox Tools binary package and the WhiteboxTools for QGIS plugin. That is the setup that matches the course labs and the examples you will see later in the quarter.
What Versions To Use
Use these versions or version families for this course:
- QGIS LTR 3.44
- Whitebox Tools for QGIS plugin from the QGIS Plugin Manager
- Original Whitebox Tools binary package for your operating system
- macOS only: download the binary that matches your Mac chip type:
- Apple silicon for M-series Macs
- Intel for older Intel-based Macs
Why this matters: If you install the wrong binary, QGIS may not be able to run the executable. Matching the download to your chip type avoids a lot of confusing startup problems.
Check Your Mac Chip Type First
If you are on a Mac, check your chip type before you download anything.
- Click the Apple menu in the top-left corner of your screen.
- Choose About This Mac.
- Look for either Chip or Processor.
- Use that label to choose the right Whitebox Tools download:
- If you see Apple M1 / M2 / M3 / M4, use the m_series download.
- If you see Intel, use the Intel download.
Download The Whitebox Tools Package
Use the shared Google Drive folder here:
https://drive.google.com/drive/folders/1T-o5oeoxZoDOWOTLZCt_EfF_Svt64sGX?usp=sharing
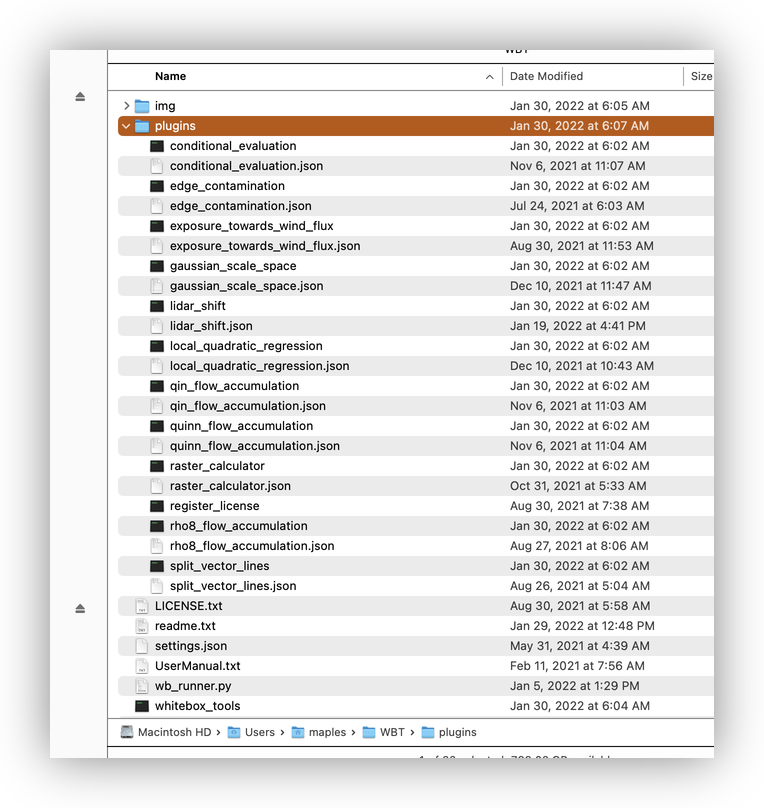
The screenshot you dropped shows the folder contents. Use that folder to download the original Whitebox Tools binary archive for your operating system.

- Download the archive for your operating system.
- If you are on macOS, make sure you chose the archive that matches your chip type.
- Unzip the archive to a stable folder on your computer.
Good places to keep the folder are:
WBTin your home folder on a Mac, such as/Users/yourname/WBTC:\WBTon Windows
Why we avoid cloud-synced folders: QGIS and Whitebox Tools are much happier when the executable lives in a normal local folder, not inside iCloud, OneDrive, Dropbox, or another synced location that might pause or move files in the background.
After unzipping, you should see a whitebox_tools executable on Mac or a whitebox_tools.exe file on Windows, plus a plugins folder.
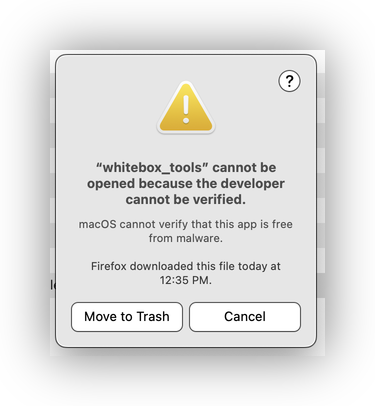
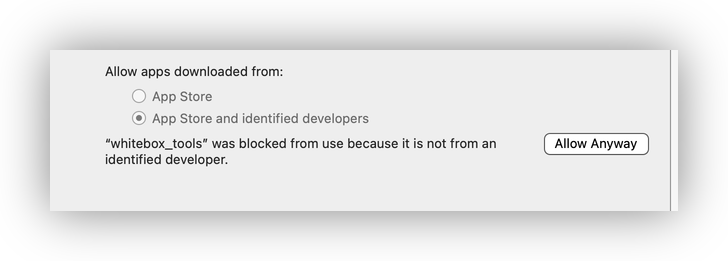
Allow Whitebox Tools On macOS
macOS may warn you the first time you try to open the downloaded Whitebox Tools executable or one of its helper tools.
- Try launching the executable once.
- If macOS blocks it, open System Settings.
- Go to Privacy & Security.
- Scroll down to the security warning.
- Click Open Anyway.
Why this happens: macOS is checking that the downloaded app was not modified after it was signed. This is a normal security check for software downloaded from the internet.
Install The QGIS Plugin
- Open QGIS.
- Go to Plugins > Manage and Install Plugins.
- Search for whitebox.
- Install WhiteboxTools for QGIS if it appears in the list.
- If you also see Whitebox Workflows, do not install it for this course.
- Close the Plugin Manager when the installation finishes.
Important: The course labs later in the quarter use the legacy WhiteboxTools workflow, not Whitebox Workflows. If you install the wrong plugin, the tool names in the lab instructions will not match what you see in QGIS.
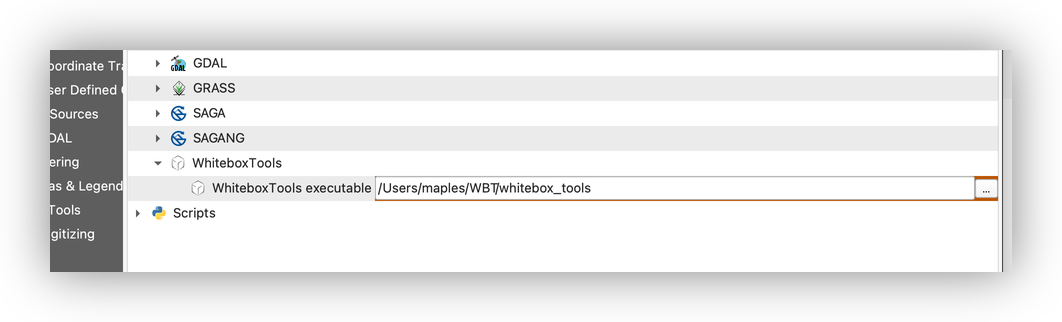
Point QGIS To The Executable
- Open Processing > Toolbox.
- Click the wrench or Processing Settings button at the top of the Processing Toolbox.
- Expand Providers > WhiteboxTools.
- Find the box next to WhiteboxTools executable.
- Click the ... button and browse to the folder where you unzipped Whitebox Tools.
- Select the
whitebox_toolsfile on Mac or thewhitebox_tools.exefile on Windows. - Save the setting and close the dialog.
Verify The Setup
After the plugin is connected to the executable, test it with a simple tool.
- Open the Processing Toolbox.
- Search for a simple Whitebox tool such as Slope or Fill Depressions.
- Run the tool on a small test raster.
- Make sure the output layer appears in QGIS.
Why we test with a small tool first: A quick test tells you whether the plugin, the executable, and the file path are all working before you get to a bigger lab workflow.
Troubleshooting
If Whitebox Tools does not appear or does not run correctly:
- Confirm that you downloaded the correct Mac or Windows version.
- On a Mac, re-check About This Mac to make sure the chip type matches the download.
- Confirm that the executable lives in a local folder such as
WBT. - Restart QGIS and check the Processing Toolbox again.
- If macOS still blocks the executable, return to Privacy & Security and choose Open Anyway.
What Comes Next
Once this is installed, later raster labs will be able to call Whitebox Tools directly from QGIS.
That means you will be ready for:
- terrain preprocessing
- flow accumulation
- watershed modeling
- other raster analysis workflows that depend on Whitebox Tools